In this fourth post of this series of posts, we finally get to how to deploy a multi user workshop environment using OpenShift, or at least, how to deploy an interactive terminal session per user accessible in the browser. Right now we are still working on the assumption that the workshop notes are deployed separately, but we will get to that in a later post.
From the second post in this series we know we could have each user log into OpenShift and deploy an instance of the terminal themselves, but that implies they know how to do that using just the OpenShift web console, or they need to be instructed how to do it.
In the interests of making things easy for attendees of the workshop at the beginning, a better workflow is to give them all the same URL. When they visit this URL, they would log in with the access credentials they were given, and be immediately dropped into their own terminal session. They can then proceed to follow the workshop notes and do the exercises.
As already mentioned, the solution I am using to handle the user authentication and spawning of a per user environment is JupyterHub. The JupyterHub software is usually used to spawn Jupyter notebooks, but it can be used to spawn other applications as well.
When using JupyterHub for applications other than Jupyter notebooks, and access to the per user instance needs to be protected, the application will though need to authorise access by checking with JupyterHub that the user is allowed to access that instance. As described, this is already catered for by the terminal image. Similarly, the other requirement of the application being able to be hosted at a set sub URL is also handled already.
Deploying the JupyterHub application
Deploying JupyterHub to a plain Kubernetes cluster can be a fiddly process. The process for doing this which the Jupyter project team provides is by using a set of Helm templates, but Helm is not a standard part of Kubernetes. Thus it would be necessary if using plain Kubernetes to deploy Helm first.
When using OpenShift, instead of using Helm templates, when deploying JupyterHub it is possible to use native OpenShift templates instead.
The original OpenShift templates for deploying JupyterHub to OpenShift were created as part of the Jupyter on OpenShift project. You can find them as part of the JupyterHub Quickstart example repository.
That example repository is intended to get you started with JupyterHub on OpenShift. It provides the source code for a JupyterHub image that can be deployed to OpenShift, along with example templates.
For deploying our workshop environment, we will be using the JupyterHub image created out of that repository, but will be using our own templates, which combines the custom configuration for JupyterHub that we need, with that image, and then deploys it.
The command for deploying an initial workshop enviroment is:
$ oc new-app https://raw.githubusercontent.com/openshift-labs/workshop-jupyterhub/master/templates/hosted-workshop-production.json
You do not need to be a cluster admin to run this command. As long as you have an OpenShift user account and have a project you can use which has sufficient quota for running JupyterHub and an instance of the terminal for each user, you are good to go.
When the oc new-app command is run, it will create a deployment config called terminals, along with a bunch of other resources. If you want to monitor the progress of the deployment so you know when it is complete, you can run:
$ oc rollout status deploymentconfig terminals
When complete, you can determine the URL for accessing the workshop environment, the URL which you would give the workshop attendees, by running:
$ oc get route terminals
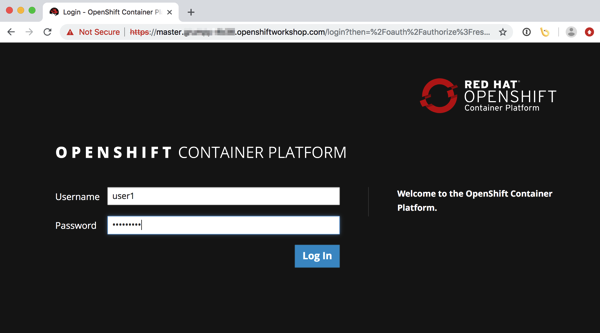
The template being used for the deployment in this case is setup to use OpenShift for performing user authentication. The workshop attendee when visiting the URL will therefore be redirected to the user login page for the OpenShift cluster, where they should enter the user credentials they were provided for the workshop.

Once login has been completed, they will be redirected back to JupyterHub. If they are one of the first users to login and the terminal image hasn't yet been pulled to the node in the OpenShift cluster, they may briefly see a JupyterHub page which tracks progress as their instance is started.

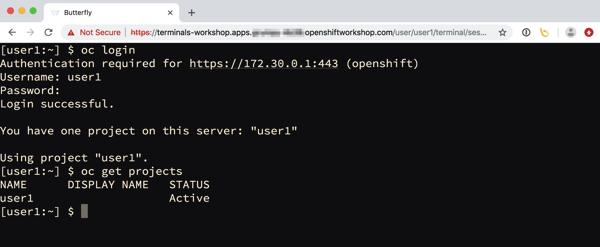
When it is ready, they will end up in the interactive terminal session in their browser. They will still need to login from the command line using their user credentials, but they will not need to indicate the address of the OpenShift cluster, as that has already been setup.

If projects have been pre-created for users, these will be visible, otherwise the user would need to create any projects as the workshop notes describe.
Persistent storage for user sessions
When running applications in containers, the file system accessible to the application is by default ephemeral. This means that if the container is shutdown, any updates made to the file system will be lost when a new instance of the application to replace it is created.
For a workshop, where exercises may involve creating or modifying files pre-populated into the image, this would mean loss of any progress and it would be necessary to start over.
Because this would be unacceptable in a workshop that may go for a whole day, the configuration for JupyterHub used with this template will allocate a persistent volume for each user session.
With how the terminal image is setup, the home directory for a user in the container will be /opt/app-root/src. A user can though write to anywhere under the /opt/app-root directory. As a result, the persistent volume will be mounted at /opt/app-root.
If you are aware of how file system mounting works, you may see a problem here. If a persistent volume is mounted at /opt/app-root, it will hide any files that may have been added in a custom terminal image.
To avoid this, when the user environment is started for the first time, an init container is used in the Kubernetes pod to mount the persistent volume at a temporary location. The contents of the /opt/app-root directory will be copied into the persistent volume from the image. For the main container, the persistent volume will then be mounted at /opt/app-root.
Using this mechanism, the persistent volume can be populated the first time with the files from the image. Any subsequent updates to any files under /opt/app-root will therefore be persistent. In the event that the users instance is shutdown, they need only refresh their web browser and JupyterHub will re-create the user environment, but where the workspace is using what was already saved away in the persistent volume, and so no work is lost.
Using your custom terminal image
When the template above is used to deploy JupyterHub for the workshop, it will by default use the workshop terminal base image. The image will provide a default set of command line tools, but will not contain any files specific to the workshop.
If a custom terminal image has been created using the steps explained in the prior blog post, this image can be used for the workshop, by passing its name as parameter to the template when deploying JupyterHub.
$ oc new-app https://raw.githubusercontent.com/openshift-labs/workshop-jupyterhub/master/templates/hosted-workshop-production.json \
    --param TERMINAL_IMAGE=my-workshop-terminal:latest
If the JupyterHub instance has already been deployed, you can override what terminal image it is using by setting the TERMINAL_IMAGE environment variable on the deployment config.
$ oc set env deploymentconfig terminals TERMINAL_IMAGE=my-workshop-terminal:latest
The value given to TERMINAL_IMAGE in each case, can be a full name for an image hosted on an image registry, or it can be a reference to an image stream and tag in the current project.
Coming up next, other JupyterHub goodies
I found JupyterHub convenient because it meant I didn't have to reinvent the wheel. JupyterHub could be setup to work with an external OAuth provider for user authentication, in this case the same sign on system as the OpenShift cluster was configured to use. Spawning and management of each users instance was also managed by JupyterHub, we just happened to be spinning up a terminal application rather than a Jupyter notebook.
In the next post I will go through some of the other built in functionality that JupyterHub provides. This includes its administration web interface and REST API, as well as its ability to the monitor web traffic passing through to a users application and culling of idle user sessions.